

As a professional real estate photographer my goal is to capture images of your property in it’s highest and best state in a manner that will impress buyers and attract optimal offers. To ensure your photo shoot goes smoothly, safely and efficiently, I have developed this photo prep checklist for you. These are things that you should plan to do during the days and hours leading up to to your scheduled session.
I have also created this one-page checklist that you can download (PDF) and share with your listing clients. This Photo Shoot Prep Checklist includes preparation tasks that should be done by the homeowner to prepare for the photo shoot. Some items may need be done weeks in advance and some the day before your scheduled shoot.

General Prep
- Be shoot-ready: Cleaning and staging needs to be done before I arrive, preferably the day before your photo shoot. I may move small items (flowers, small pictures, etc.) to improve photo composition, but larger items need to be in place before I arrive, and staging accessories need to be in place.
- Secure or remove pets: I love pets but we can’t have them around for your photo shoot. Dogs must be secured or off the property to ensure the safety of myself and my equipment. MLS rules also prohibit people and pets from being in pictures. Cats should be secured as well, although they usually pose fewer problems than dogs (cats often just hide). It’s also a good idea to hide pet food and water bowls as well.
- Plan not to be seen: All occupants should plan on either being off the property or remain in areas where they can’t be seen during the photo shoot. Rooms overlap in the photos, people can cause shadows and reflections, and there is risk to equipment that will be setup throughout the property.
- Use the garage for storage: I normally don’t shoot garages, so this is a great place to store items you’d like to hide.


Interior Prep
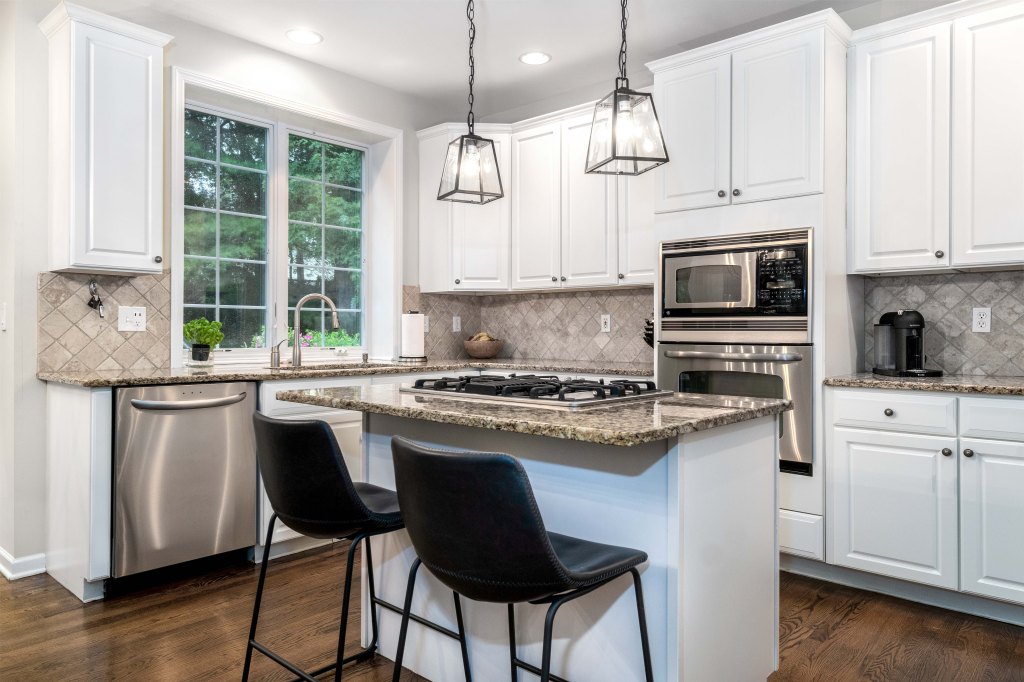
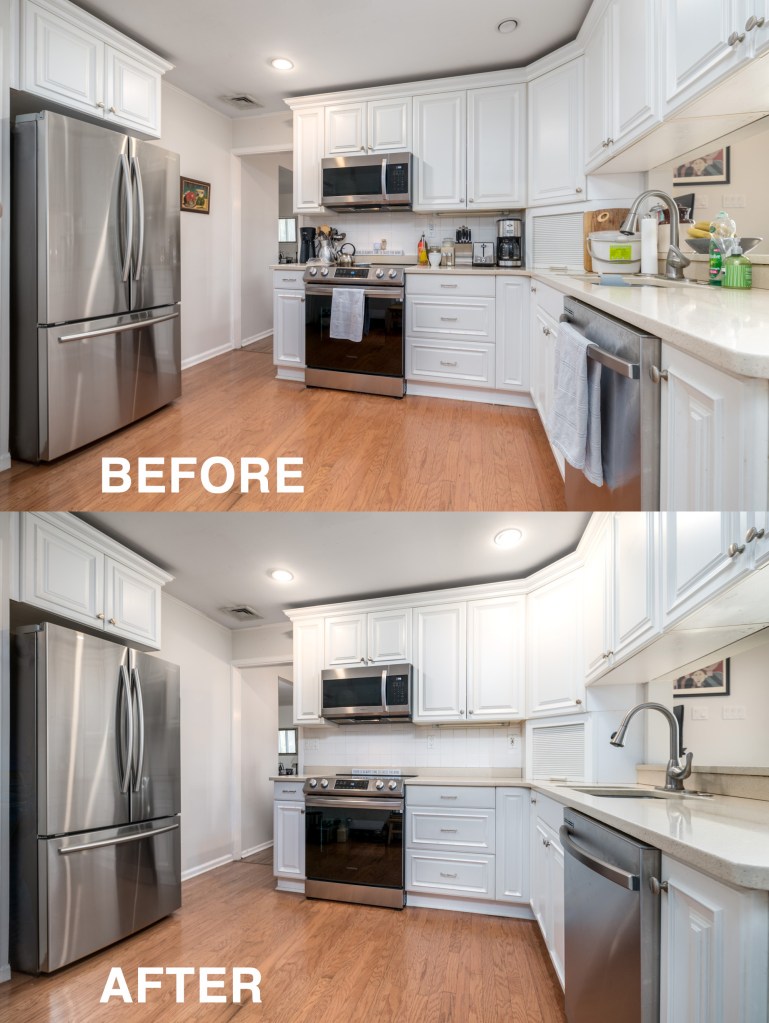
- Kitchen: A few items on the counters are usually fine, but dishes, sponges, towels, drying racks, etc. should be put away. It’s best to remove all magnets, pictures, etc. from the refrigerator and remove rugs/pads from the floor. Kitchen islands should be clear and any shelving should be organized. All cabinet doors should be completely closed. (See “Before & After Examples” below)
- Dining: Clear, set and stage dining table(s): Tables in the kitchen and/or dining room should be clear of all items except tableware. Table sets are optional, but if done they should appear neat and clean.
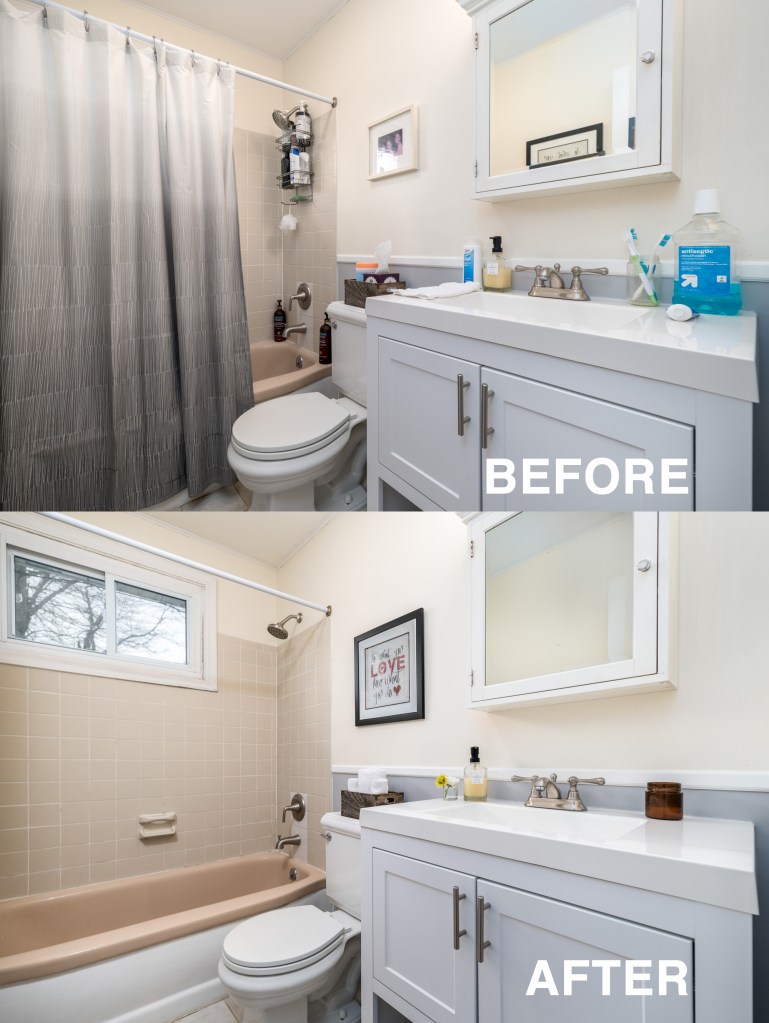
- Bathrooms: Toothpaste, toothbrushes, razors, and other “personal” items should be hidden. Decorative unused soaps, candles, flowers, etc. are preferred. It’s also good to remove all throw rugs from the floor. If towels are visible they should be brand new or completely unused.
- Prep bedrooms: All bedrooms should have beds neatly made and all random items put away. Clear nights stands of all personal items. Hide or remove visible items under beds. Organize desks, dressers and shelves. Remove or hide loose laundry and baskets. Remove personal photos. Remove hanging robes from behind doors or on walls.
- Prep bathrooms: Remove all visible items from the vanity sink and tub/shower,. It is generally preferred to have shower curtains open, especially if the shower and/or tub are key selling features. Glass doors and mirrors should be clean and streak free. Remove all towels unless they are brand new or unused. Remove floor mats and toilet accessories. Remove hanging robes and accessories from behind the door. All toilet seats should be down.
- Hide trashcans: Trashcans can distract so it’s best to hide all of them in closets or the garage.
- Hide portable fans and heaters: Ceiling fans are selling items but portable fans and space heaters can give the wrong impression. It’s always best to hide all portable fans and heaters.
- Hide cords and remotes: Sometimes electrical cords can’t be hidden, but you will have more appealing pictures if you can hide TV remotes, game consoles, and any noticeable cords.
- Declutter living areas as much as possible, including toys, boxes, bags and anything that is not considered a decoration for the house. Use the garage or any other unfinished space to store these items. Fluff seat cushions and remove excess pillows from chairs and sofas. Remove personal items from coffee and end tables, and any horizontal surfaces. Remove personal photos.
- Clear entryways, including mud rooms: Remove all shoes, umbrellas, and similar items from entryways. Organize cubicles and hanging items if present. The fewer items the better.
- Open blinds in windows with views: Your indoor photos will show outdoor views, so it is always best top open blinds to expose the views when desirable.
- Turn on lights: Before I arrive, please make sure all interior lights are turned on. If need-be, please replace all burned-out bulbs at least 24 hours before the photo shoot. White (cool) bulbs are generally preferred over yellow (warm) bulbs whenever possible, but I can work with both.
- Turn off ceiling fans: Before I arrive, please make sure all ceiling fans are turned off.
- Clean windows: Any glass windows or doors that offer attractive views of the exterior, or that are not covered by drapes or blinds should be cleaned and streak free on both the interior and exterior.


Exterior Prep
- Clear the cars: Make sure no cars are in the driveway. If possible, also move cars from the street in front of the home. We want as clear a view as possible of your property.
- Hide trashcans: Trashcans can be placed on the side of the property or in the garage.
- Hide hoses: Do this the day before the shoot since hoses can drip water onto the pavement when being moved, leaving puddles in your pictures.
- Prep the yard: Do at least 24 hours prior to your photo shoot. Yard should be mowed and cleared of any toys, tools, etc.
- Turn off sprinklers: Do not water the day of the shoot to prevent puddles on pavement.
- Pick up poop: If you have a dog, make sure all of their droppings are cleared from the yard.
- Prep pool and spa: If you have a pool and/or spa, please have them clean with covers removed. For spas, provide instructions to the realtor on how to turn it on. Remove floats, noodles, etc…
- Prep water features: If you have fountains, waterfalls, etc., please clean them and provide instructions to the realtor on how to turn them on.
- Clean patio furniture: Dust and remove cobwebs from all outdoor furniture. Do not hose down your furniture the day of your shoot, since this can create puddles.
- Clean roof and gutters: Any visible debris on the roof or in the gutters should be removed.
- Pressure wash: If needed and feasible, have the house, walkways and outdoor furniture to remove any visible dirt and mildew or stains. This may require a professional, as well as time to schedule.


Before & After Examples
There are different perspectives on what is considered clean, organized and decluttered. Of course there is no right or wrong answer, but generally speaking, ‘less’ is better than ‘more’ in real estate photography.
Below are a few example of photos that show a typical home BEFORE it is prepared for a photo shoot and AFTER some adjustments were made to make it more photo ready.
KITCHEN
It may seem extreme at first, but kitchens generally look best when there the counter tops are completely empty, including small appliances. Although this kitchen is actually over 15 years old, with relatively new appliances, the bare counters provides the viewer with the impression the kitchen was recently remodeled and has yet to be used for cooking. You may also notice smaller details, such as the burned out light bulb on the ceiling in the before photo, which was replaced with a new bulb for the after photo.
BATHROOMS
Similar to kitchens, bathrooms generally look much more appealing when there are little to no items on the vanity counter top and in the shower. In the before photo there were also other items on the wall inside the shower (hidden by the curtain). By removing those items I was able to open the curtain to reveal the entire shower and tub, as well as the window view. You may also notice smaller details such as the changing of the frame on the wall above the water tank.
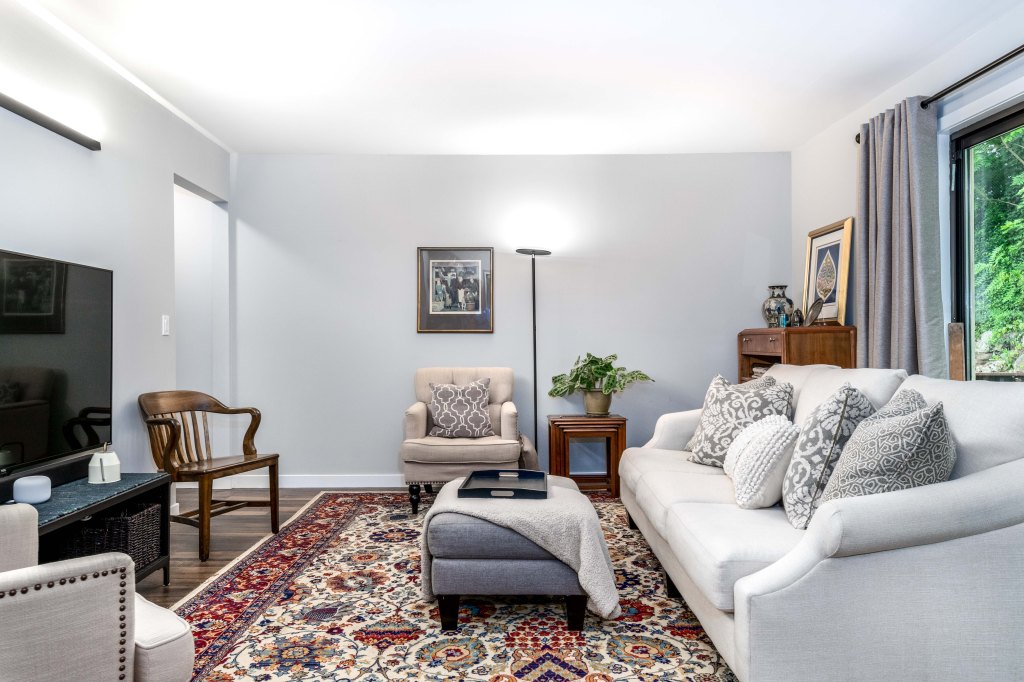
LIVING AREAS
This example for this living room applies to almost all living areas. The changes here might be more subtle, but notice how much nicer the sofa looks in the after photo with the removal of two blankets and one of the pillows. Remember the rule that less is almost always better in photos. The coffee table was also moved slightly to the center and now has a simple bouquet of flowers. I also removed the items from under the end table and replaced the wedding photo above the fireplace with wall art. I also opened the curtain to reveal the outside view. You may also notice that I digitally added a couple of items to the after photo. Can you see what those two additions are and how they impact the image?

